
How to Use a Motorola Walkie Talkie Your Practical Guide
Getting comfortable with a Motorola walkie talkie is actually pretty intuitive once you understand the key functions. At its core, you just need to power on the device, pick the right channel with the top knob, and press the big Push-to-Talk (PTT) button on the side to talk. Let go of the PTT, and you're ready to listen for a reply.
Your First Steps with a Motorola Walkie Talkie
When you first get your hands on a professional-grade Motorola radio, it can feel a little intimidating. Don't worry, these things are built for fast, intuitive use, especially when you're under pressure. The absolute first thing to master is the physical controls. Forget the user manual for a minute—the goal right now is to build the muscle memory you'll rely on every single time you use it.
Mastering the Core Physical Controls
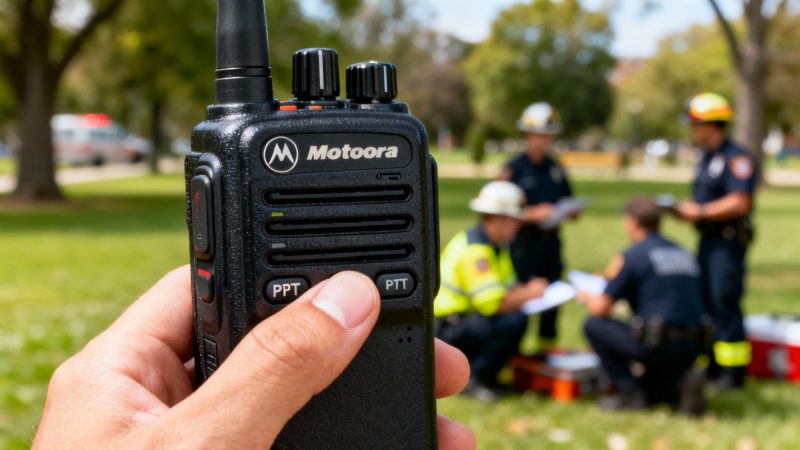
Almost every Motorola portable radio is built around three main controls. They’re designed to be tactile, so you can operate them by feel without ever having to look down.
- The Power and Volume Knob: This is almost always the top knob. A simple clockwise turn powers the device on. You’ll probably hear a startup beep and see an indicator light flash to life. Keep turning it clockwise to crank up the volume.
- The Channel Selector Knob: Sitting right next to the power knob, this one clicks into place for each channel. That solid, tactile feedback is your confirmation that you've successfully switched to a new channel.
- The Push-to-Talk (PTT) Button: This is the big, usually textured button on the side of the radio. You can't miss it. Press and hold it down to transmit, and simply release it to listen.
Here's a pro tip that makes a huge difference: always pause for a beat after you press the PTT button but before you start talking. This one simple habit stops the beginning of your message from getting cut off and ensures everyone hears you loud and clear from the start.
A Practical Scenario Putting It All Together
Let's say you're directing volunteers at a local festival. You need to get Team B over to the main gate.
First, you'd turn the power/volume knob clockwise until the radio beeps on. Find a relatively quiet spot and adjust the volume so it's at a comfortable level. Next, turn the channel selector knob to the channel you've all agreed on for "Team B."
Finally, press the PTT button, pause for that crucial second, and then speak clearly: "Team B, this is Base. Please head to the main gate. Over." Release the button and listen for their confirmation.
These fundamental skills are the same across just about every Motorola model you'll encounter. If you run into more complex issues or need detailed troubleshooting help, you can find a ton of information in our comprehensive support resources for first responders.
For a quick and easy reference, check out the table below. It breaks down these essential controls for when you need a fast reminder.
Essential Motorola Walkie Talkie Controls
| Control or Button | Primary Function | Actionable Tip |
|---|---|---|
| Power/Volume Knob | Turns the radio on/off and adjusts incoming volume. | Always test your volume in a quiet spot first to avoid broadcasting a startlingly loud squawk when you receive your first call. |
| Channel Selector Knob | Switches between pre-programmed channels or talkgroups. | If your radio announces the channel number as you turn the knob, listen to confirm you're on the right one without looking. |
| Push-to-Talk (PTT) | Transmits your voice over the selected channel. | Hold the radio a few inches from your mouth and speak clearly. Shouting into the mic will only distort your voice. |
Keep this handy as you're getting started, and these actions will become second nature in no time.
Choosing the Right Channel and Privacy Code
Once you've mastered the basic controls on your Motorola walkie-talkie, you can really dial in your comms for clarity and reliability. The key is understanding how to pick the right channel and privacy code for whatever you're doing. It’s a lot like tuning an old AM/FM radio—you’re trying to find a clean frequency without a bunch of static and crossover talk.
Imagine you're trying to keep track of your family at a packed amusement park. If you just turn on the radios and start talking, you’re going to hear dozens of other groups doing the exact same thing. This is where channels and privacy codes become your best friends. By selecting a specific combination, you essentially create a semi-private line for your group, filtering out all that other noise.
Understanding Channels: FRS vs. GMRS
Most consumer Motorola radios run on one of two services: Family Radio Service (FRS) or General Mobile Radio Service (GMRS). They often share some of the same channel numbers, but the real difference comes down to power and range.
FRS is completely license-free, which is great for casual use. However, it's limited in power by the FCC. This makes it perfect for short-range stuff, like keeping an eye on the kids at a campground or coordinating cars in a convoy on the highway.
GMRS, on the other hand, packs a much bigger punch. It allows for significantly higher power output, but here's the catch: you need an FCC license to operate on GMRS frequencies legally. This is an absolute game-changer for anyone serious about their radio comms.
Actionable Money-Saving Tip: A GMRS license is a small investment that covers your entire immediate family for ten years. If you're into activities like off-roading, hunting, or managing a large property, paying the one-time fee is way cheaper than buying a more expensive radio system just to get a similar boost in range and reliability.
The Role of Privacy Codes
This is a common point of confusion, so let's clear it up. Privacy codes—sometimes called CTCSS or DCS codes—do not encrypt your conversation or make it private. Anyone with a scanner or another radio on the same channel can still hear you.
What these codes do is act like a filter. They mute any transmission on your channel that doesn't have the matching code you've selected. This is how you silence all the chatter from other groups using the same channel.
- Practical Example: Let's say you're skiing with friends and you all agree to use Channel 7 with Privacy Code 15. Now, your radios will only unmute when they receive a signal from another radio set to that exact same combination. You won't hear the ski patrol on Channel 7, nor will you hear another family who happens to be on Channel 7 but is using a different code (or no code at all).
This quick flowchart is a great mental checklist to run through every time you pick up your radio.
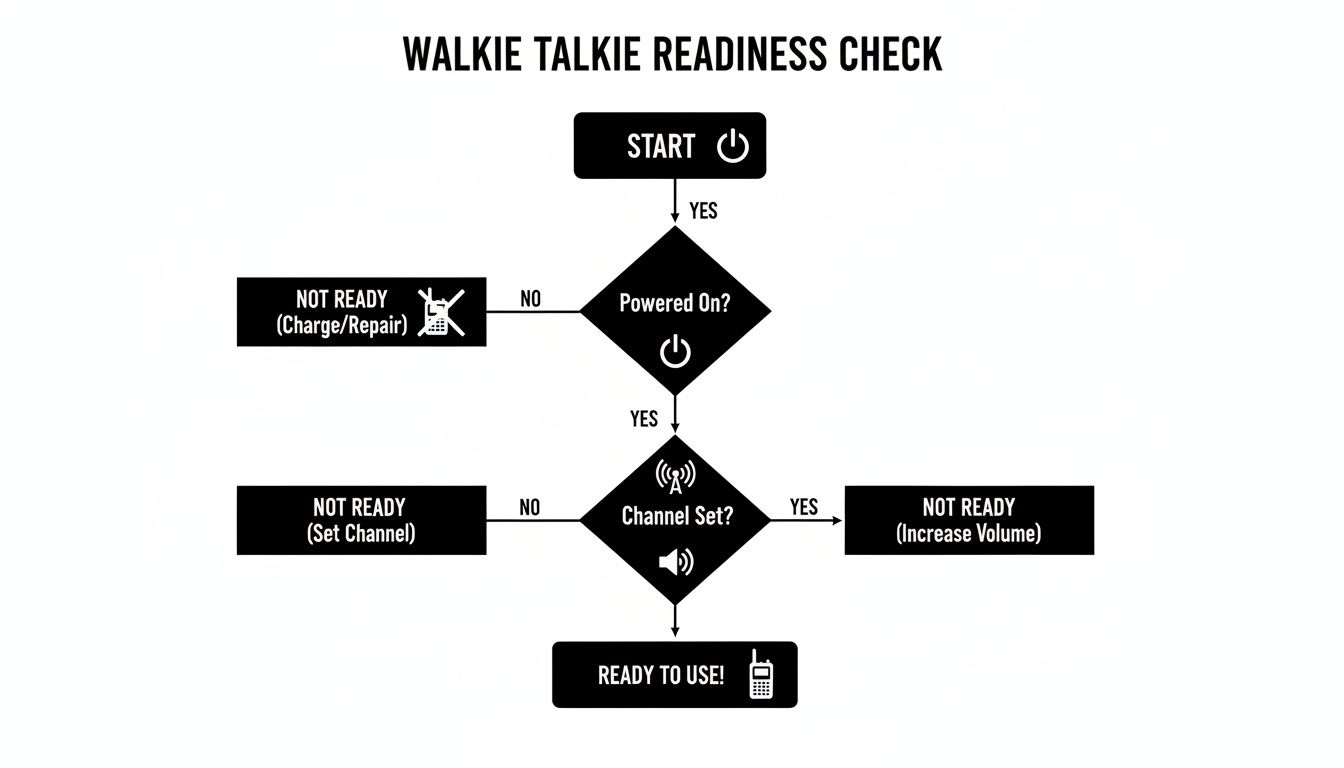
It just reinforces the three fundamentals: Is it on? Is it on the right channel? Is the volume up?
It’s also important to know the hard limits. Most consumer radios in the U.S. use those FRS or GMRS bands, while in Europe, you'll see PMR446. FRS radios are legally capped at 2 watts, giving you a realistic range of about 0.5–2 miles in a typical suburban environment. Licensed GMRS handhelds, pushing 1–5 watts, can easily double or even triple that distance under the same conditions. It really shows why the license is worth it for anyone needing that extra reach. If you want to dive deeper, you can read more about walkie-talkie market trends and regulations to get a better sense of the landscape.
Using Advanced Features for Better Communication
Your Motorola radio is a whole lot more than just a fancy talk button. These things are packed with features designed for the real world, turning a simple device into a serious tool for coordination and safety. If you really want to get your money's worth, you need to get comfortable with these functions.
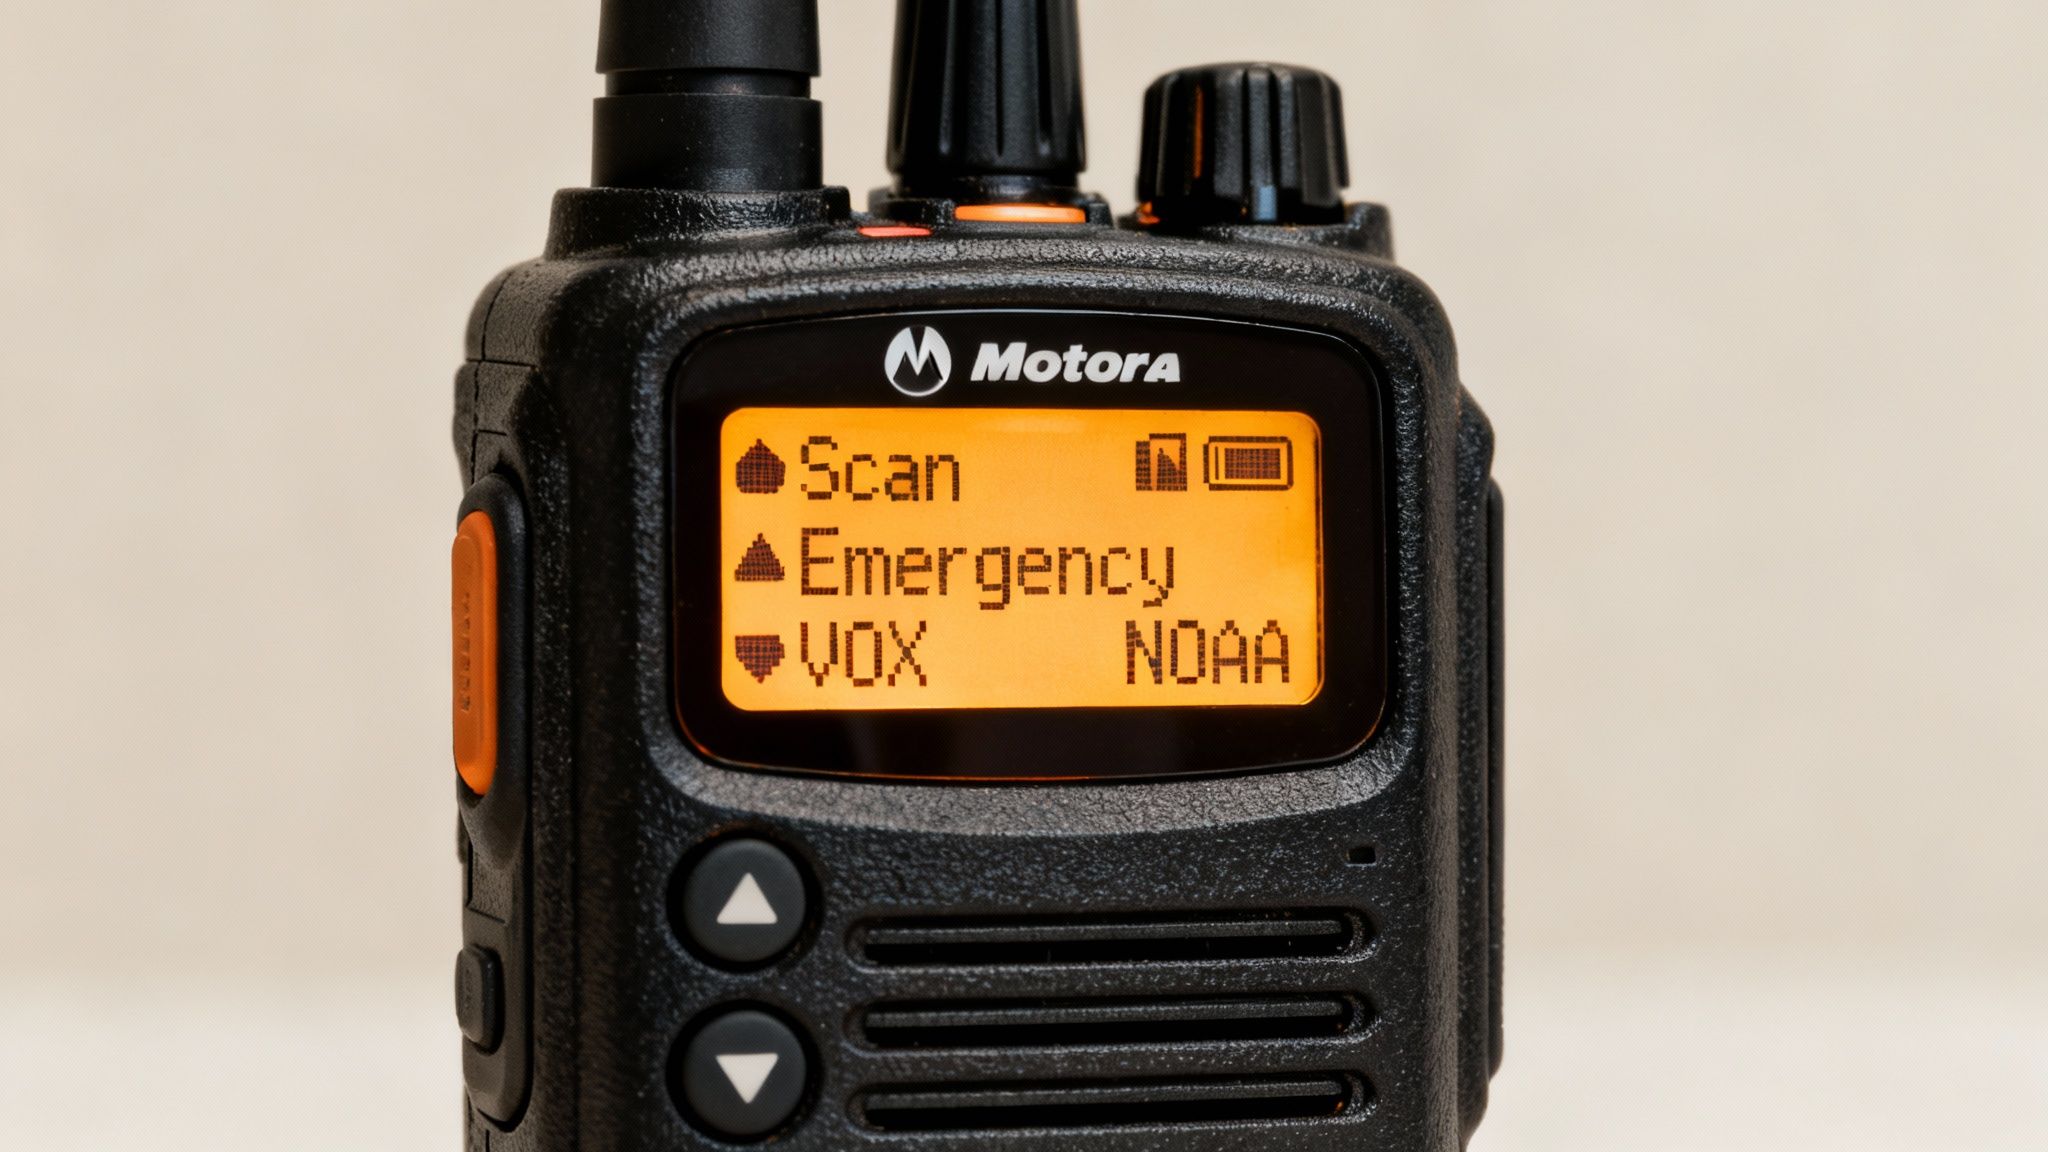
One of the most powerful tools in your arsenal is the Scan feature. Instead of being stuck on a single channel, scanning lets your radio cycle through several channels at once. The moment it detects traffic, it locks onto that channel so you can hear what's going on. For anyone running an event and trying to keep tabs on logistics and security at the same time, this is an absolute game-changer.
Maximizing Situational Awareness with Scanning
Let's say you're running security for a big outdoor concert. You can set up your radio to scan the main operations channel, the medical team's frequency, and your security channel. This gives you a bird's-eye view of everything happening without you having to constantly fiddle with the channel knob. You can stay focused on your job while keeping an ear on everyone else.
- Practical Example: A construction foreman can scan the channels for the crane operator, the ground crew, and the delivery drivers. If there's an issue with a delivery, they'll hear it instantly and can redirect people without missing a critical call from the crane.
This single function lets one person effectively keep tabs on multiple teams, which is a massive advantage for any leader.
Hands-Free Operation and Critical Alerts
For those times when your hands are tied up, Voice-Activated Transmit (VOX) is your best friend. Once it's turned on, the radio's microphone automatically starts broadcasting when you speak—no need to mash the PTT button. This is perfect for cyclists, skiers, or anyone who needs to communicate while keeping their hands on the task.
Actionable Money-Saving Tip: Don't go out and buy expensive, specialized hands-free comms for things like rock climbing or kayaking. Just turn on the VOX feature on your Motorola. Pair it with a decent headset, and you've got reliable, hands-free communication for no extra cost.
Just as important is the Emergency Alert button, which is usually bright orange or red for a reason. Pressing it sends a high-priority alarm to all the other radios in your group. It will often open your mic for a few seconds, too, so your team can hear what's happening. This is a crucial safety feature for lone workers or anyone heading into remote areas. Only use it for true emergencies where you can't talk, like an injury or an immediate threat.
A lot of Motorola radios also come with NOAA Weather Alerts. This feature will automatically scan for and notify you about severe weather broadcasts from the National Weather Service. If you're a hiker, boater, or camper, this is an early warning system that can give you precious time to find shelter before things get ugly.
For organizations that need to tie all these functions into a larger command system, it's worth checking out how different first responder mobile app features can track and log this kind of radio traffic. Learning to use these advanced capabilities takes your Motorola walkie-talkie from a simple convenience to a vital piece of gear for safety and efficiency.
Maximizing Battery Life and Device Care
Let's be honest, a radio with a dead battery is just an expensive paperweight. Taking care of your equipment is more than just remembering to charge it—it’s a discipline. It’s what ensures your radio actually works when you need it most and, frankly, saves your department a ton of money on replacements down the road. It’s the small, consistent habits that make all the difference.
It all starts with a smart charging strategy. This goes way beyond just plugging it in at the end of a shift. Most modern Motorola radios use lithium-ion (Li-ion) batteries, and they have different needs than the old tech you might be used to. A key thing to remember is that Li-ion batteries hate being drained completely. Intentionally running them down to zero can actually shorten their overall lifespan.
Smart Charging and Power Management
Getting the most out of every single charge cycle means being smart about how you use power. Not every transmission needs the full blast of your radio's power.
- Drop Your Transmit Power: Most radios have a high and low power setting. If you’re just talking to someone across a building or within a small incident scene, switch to low power. You’d be amazed how much battery this saves. It can easily add hours to your operational time.
- Embrace Battery-Saver Mode: This feature is your best friend on a long shift. It puts the radio in a light "sleep" state when it's quiet, instantly waking up the second a signal comes in. You won't miss a thing, but you'll drastically cut down on that idle power drain.
- Keep It Cool: Heat is the enemy of any battery. Never, ever leave your radio or spare batteries sitting on the dash of your truck in direct sun. That’s one of the fastest ways to kill a battery for good.
Actionable Money-Saving Tip: A solid, disciplined battery program can extend the life of your batteries by up to 40%. Think about that. For an agency with 100 radios, that discipline can save thousands of dollars a year in replacement costs. That's budget that can be used for other critical gear.
Routine Physical Maintenance
Beyond the battery itself, the physical shape of your walkie-talkie is what determines its long-term reliability. A quick, 30-second inspection at the start of your shift can prevent a critical failure when you're in the thick of it.
First up, check the antenna. Is it screwed on tight? Give it a quick look for any cracks or fraying near the base. A bad antenna doesn't just kill your range; it can actually damage the radio's transmitter over time, turning a simple fix into a costly repair.
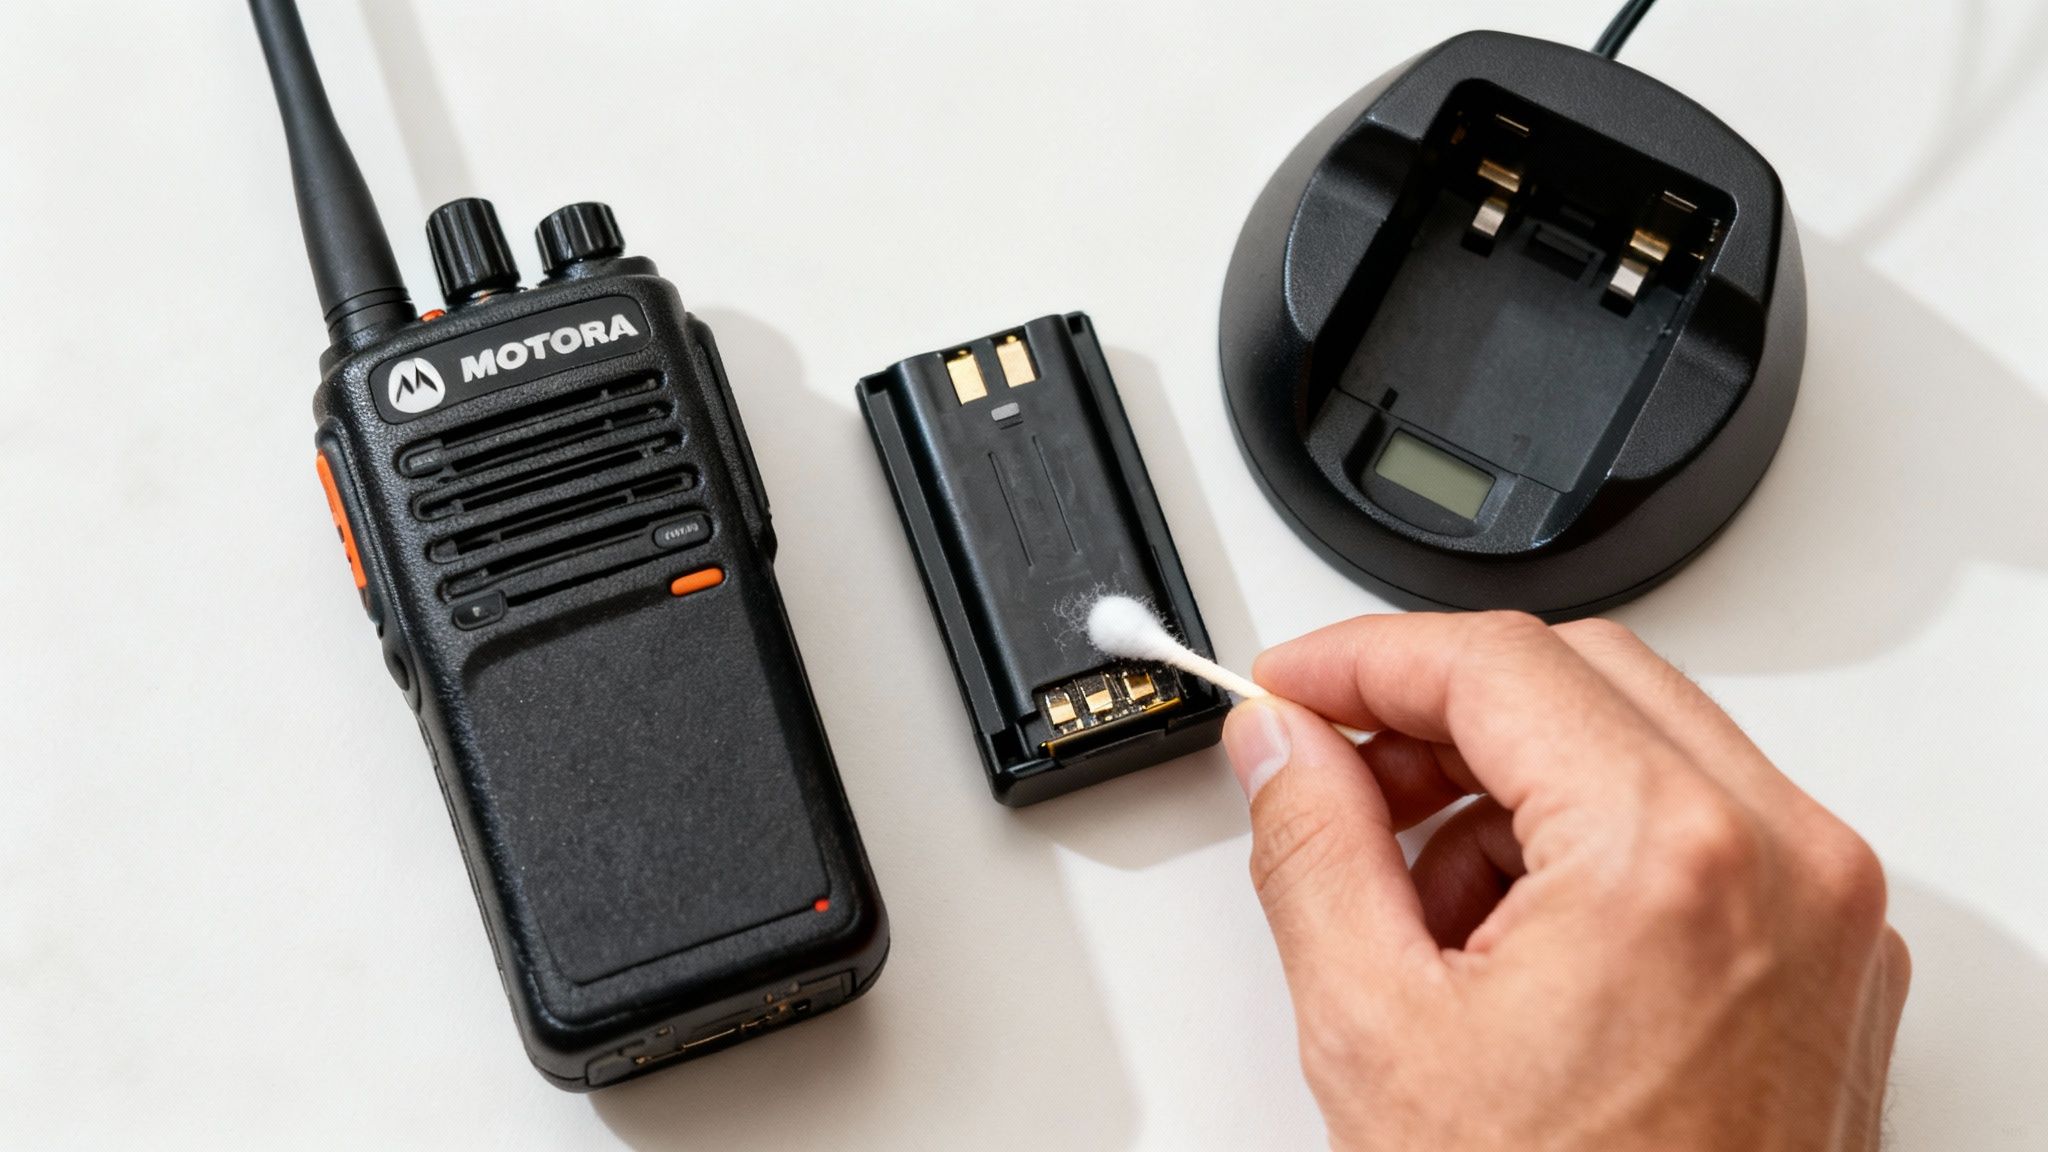
Next, glance at the battery contacts. Those little metal points on both the battery and the radio can get covered in dust, dirt, or whatever else you've been through that day. This gunk leads to a poor connection and can cause your radio to power off intermittently. A quick wipe with a dry cloth or a cotton swab with a bit of rubbing alcohol is all it takes to keep that connection solid.
This little checklist should become second nature:
- Antenna Check: Is it secure and undamaged?
- Contact Cleaning: Are the battery and radio contacts clean?
- Port Inspection: Is the accessory port cover sealed, or is your mic screwed in all the way?
These small habits are what will keep your Motorola radio in the fight, shift after shift.
Mastering Two-Way Radio Communication Etiquette
Just knowing how to turn on your Motorola walkie-talkie and press the PTT button is only half the battle. What really separates a pro from a novice is how they communicate, and that all boils down to good radio etiquette.
These are the unwritten rules of the road that keep channels clear and ensure every single message is understood on the first try. It’s about keeping those vital lines of communication open for everyone who needs them.
The most fundamental rule is also the one that's easiest to forget in the heat of the moment: listen before you speak. Before your thumb even gets near the PTT button, take a second to make sure the channel is actually clear. Interrupting an ongoing transmission creates a mess of garbled noise and forces both people to start over, which just wastes valuable airtime for everybody.
The Foundation of Clear Communication
Solid radio discipline is built on a few simple, powerful habits. The first one is small but has a huge impact: pause for a full second after you press the PTT button but before you start talking. This tiny delay is crucial—it prevents the first few words of your message from getting clipped off.
You should also think through your message before you even transmit. A well-structured transmission is quick, easy to understand, and leaves zero room for someone to misinterpret what you meant.
- Identify Yourself First: Always lead with who you are and who you're calling. This immediately lets the listener know if the message is for them.
- Keep it Brief: Radio channels are a shared resource. State your business clearly, concisely, and then get off the air so someone else can use it.
- End with a Clear Sign-off: A simple "over" tells the other person you've finished talking and are waiting for their reply. Using "out" means the entire conversation is finished.
Actionable Money-Saving Tip: Clarity reduces repetition. Every time a message needs to be repeated, it clogs the channel and distracts others. Disciplined communication that is right the first time boosts operational efficiency. This discipline can delay the need for an organization to purchase additional licensed frequencies—a massive long-term financial saving.
Practical Examples in Different Scenarios
The way you communicate is going to change depending on the situation. What works for a family out on a hike is completely different from what’s needed for a professional event security team.
Casual Use (Family Hike):
- "Sarah, this is Mark. We're at the summit. Over."
- "Mark, copy that. We'll meet you there in ten. Over."
Professional Use (Event Security):
- "Control, this is Team Alpha. We are en route to the west gate. Over."
- "Copy, Alpha Team. Advise when you are on location. Out."
Using the Phonetic Alphabet for Precision
When you're in a noisy environment or need to pass along critical information like a license plate or a last name, the phonetic alphabet is your best friend. It completely removes the chance of mishearing one letter for another.
For example, don't just rattle off a plate like "5PDB789." Instead, you transmit it with absolute clarity: "Five Papa Delta Bravo seven eight niner." This takes all the guesswork out of the equation and guarantees the information gets through with 100% accuracy.
Getting these simple etiquette rules down will take your radio skills to the next level, turning your Motorola walkie-talkie into an incredibly reliable tool for any situation you find yourself in.
Frequently Asked Questions About Motorola Walkie Talkies
Even after you've gotten the hang of your radio, using it out in the field always brings up new questions. It just happens. Here are some quick-and-dirty answers to the most common problems we see, so you can get back to communicating clearly.
Why Can People Hear Me but I Cannot Hear Them?
This one is incredibly frustrating, but it almost always comes down to one of three culprits. First off, double-check your settings. Your channel and your privacy code must exactly match what the rest of your group is using. If you're on Channel 8, Code 4, but they're on Channel 8, Code 5, you'll be able to transmit to them but won't hear a thing back.
Second, think about your location. You might be right on the edge of your effective range. Your signal could be just strong enough to hit a powerful repeater or another user who's on higher ground, but their return signal can't punch through the obstacles to get back to you. The easiest fix? Try moving to higher ground or just stepping into a more open area.
Finally, take a look at your battery. A weak battery will die on transmit long before it dies on receive because sending a signal eats up way more power. If your battery is low, it might not have enough juice to push your signal out effectively.
What Is the Best Channel to Use?
For casual use in a crowded place like a park or an event, I always tell people to start with the higher FRS channels (8-14). These are limited to a lower power output by law, which means they are usually less congested than the first seven channels that everyone defaults to.
If you're still hearing a lot of chatter, use your radio's scan feature to find a quiet channel before your group heads out. For the best experience, get everyone to agree on both a channel and a privacy code (for example, Channel 12, Code 3).
Practical Example: A family at a theme park can agree to use Channel 10, Privacy Code 25 before splitting up. This combination doesn't make their conversation private, but it acts like a filter. It mutes anyone who isn't on that exact setting, which is a lifesaver when you're trying to communicate in a loud, distracting environment.
How Can I Increase My Walkie Talkie Range?
While you can't legally modify a consumer radio to boost its power, you can absolutely maximize the performance you already have. The biggest factor, hands down, is line of sight.
- Get High: Climbing to higher ground is the single most effective thing you can do to extend your range. Period.
- Avoid Blockages: Move away from dense buildings, thick woods, and big hills. Concrete, steel, and earth are the enemies of radio waves.
- Keep it Straight: Hold your radio so the antenna is pointing straight up toward the sky, not sideways or at the ground.
For organizations that need guaranteed, wide-area coverage, individual walkie-talkies will eventually hit a wall. In those scenarios, it's time to look into professional wireless deployment solutions that can set you up with repeaters and a proper infrastructure. Likewise, teams trying to integrate radio traffic with digital tools can get a lot of value out of first responder and business mobile apps.
At Resgrid, LLC, we build a comprehensive dispatch and management platform to keep your team connected and coordinated, no matter the situation. See how our system can fit into your communication strategy by visiting https://resgrid.com.