
A First Responder’s Guide to Motorola Radio Antennas
When you’re in a mission-critical situation, your Motorola radio is your lifeline. But it’s the motorola radio antennas that are the real unsung heroes making sure your message actually gets through.
Think of it this way: a world-class radio is like a powerful engine, but the antenna is its set of tires. If you don't have the right tires for the terrain, all that power is completely useless. This guide is all about giving you the practical know-how to get your communications network dialed in and, just as importantly, save some money by making smart antenna choices from the start.

Why Your Antenna Is the Unsung Hero of Radio Communication
Anyone who’s worked as a first responder or managed an agency fleet knows how crucial reliable comms are. A dropped call or a garbled message isn't just a minor hiccup; it can have real, serious consequences for officer safety and the success of an entire operation. The radio itself gets all the attention, but its performance is directly tied to that small, vital component screwed onto the top: the antenna.
Picking the right antenna is honestly one of the most cost-effective upgrades you can make to your entire radio system. It’s a simple, informed choice that can prevent dropped calls in those critical moments and provide a rock-solid foundation for everything from dispatch to vehicle tracking. It has a direct impact on signal clarity, extends your communication range, and ultimately gives every team member in the field better situational awareness.
The Foundation of Reliable Networks
There's a reason Motorola Solutions is such a powerhouse in the two-way radio world, holding a dominant 29% global market share as of 2023. That kind of leadership doesn't happen by accident. It's fueled by a massive commitment to innovation—the company invested a staggering USD 1.2 billion into R&D that year alone.
That commitment is what leads to cutting-edge antenna technologies that are precisely tuned for the tough demands of mission-critical work. You can dig into more data on the two-way radio market to see these trends for yourself.
Key Takeaway: Don't think of an optimized antenna as an expense. It's an investment. A small upgrade can give you a much bigger return in performance and reliability than replacing an entire radio, potentially saving your agency thousands in unnecessary equipment costs.
Practical Benefits of the Right Antenna
Making a smart antenna choice gives you immediate, real-world advantages that you'll notice right away. It's the kind of thing that can be the difference between a smooth operation and a day filled with frustrating communication gaps.
- Enhanced Signal Clarity: A properly matched antenna cuts down on static and interference. That means every word comes through crystal clear, especially when you're inside a building or out in a remote area.
- Extended Communication Range: The right antenna helps you get the most out of your radio’s power, pushing your signal further and closing those annoying coverage gaps without having to spend a fortune on new repeaters.
- Improved Officer Safety: Reliable communication is a lifeline, period. A good antenna setup ensures messages get through the first time, every time, which directly contributes to the safety of your people in the field.
- Optimized System Performance: If your agency relies on GPS tracking or other data systems, a high-performance antenna ensures you have a stable connection. That means accurate location data when it matters most.
This guide will cut through the technical jargon and give you the practical knowledge you need to select, install, and maintain the right Motorola radio antennas for your specific job.
Decoding Antenna Frequencies and Connectors
Picking the right Motorola radio antennas can feel overwhelming, but it boils down to two simple things: the antenna's frequency and its connector. Get those two right, and you've solved 90% of your potential problems right out of the gate. It's the simplest way I know to avoid wasting money on gear that won't work.
Think of radio frequencies like highways. Each one is built for a specific purpose and a specific type of terrain. If your radio is on the VHF "highway," you need an antenna designed for that road. Putting a UHF antenna on a VHF radio is like trying to drive a semi-truck down a narrow bike path—you're not going to get very far.
Matching Frequencies to Your Mission
You'll almost always be working with one of three main frequency bands: VHF, UHF, or 700/800 MHz. Each has its own strengths and weaknesses, and picking the right one for your operational area is one of the most critical decisions you'll make.
VHF (Very High Frequency): This is your open country road. VHF waves travel long distances in rural areas with few buildings or hills. It's the go-to for sheriff's departments covering huge counties or for park rangers out in the wilderness. The trade-off? These waves don't like punching through concrete and steel.
UHF (Ultra High Frequency): Think of these as your city streets. UHF waves are shorter, which makes them fantastic at bouncing around and through the urban jungle. They have much better penetration through walls and buildings, making them standard issue for city fire departments, hospital security, and police in dense downtown cores.
700/800 MHz: This is the dedicated public safety expressway. This band is reserved specifically for first responders. It's engineered for excellent building penetration and, just as importantly, for interoperability. This is the band that lets different agencies talk to each other seamlessly during a major incident.
Getting this right isn't just about performance; it's about being good stewards of your budget. For first responders, choosing the correct antenna for the operational environment is a fundamental part of the job.
Here's a quick reference to help you match the band to your needs.
Motorola Radio Frequency Bands At-a-Glance
| Frequency Band | Typical Range | Building Penetration | Best Use Case | Example Motorola Radio Series |
|---|---|---|---|---|
| VHF | Long | Poor | Rural patrol, wildland firefighting, large open areas | APX 900, XPR 3000e Series |
| UHF | Medium | Good | Urban policing, firefighting, campus security, indoor use | APX NEXT, XPR 7000e Series |
| 700/800 MHz | Medium | Excellent | Public safety, multi-agency response, dense urban areas | APX 8000, APX 6000 |
This table is just a starting point, but it shows how a simple choice can have a huge impact on how well your team communicates when it matters most.
The Real Cost of a Mismatch
Using an antenna that isn’t tuned to your radio’s frequency is a recipe for disaster. I once saw a rural department accidentally order UHF antennas for their entire fleet of VHF radios. Their communication range in the open county they served was cut by more than 50%. It was a simple mistake that almost forced them to spend thousands on a signal booster they never would have needed with the right antennas.
An antenna is tuned to a specific frequency band, much like a guitar string is tuned to a specific note. Using the wrong antenna is like playing a sour note—you get noise, poor performance, and you can even damage your radio's transmitter over time.
Getting the Connection Right
Once you've nailed down the frequency, the connector is the final piece of the puzzle. It's a simple physical check, but you'd be surprised how often it gets overlooked. An antenna with the wrong connector simply won't screw onto your radio.
Motorola uses a few common types, and knowing which one your radios—like an APX versus an XPR—use will save you a ton of headaches.
Here’s a pro tip: Before you place a bulk order, buy one single antenna to test the fit. Make sure it physically connects to your specific radio models (e.g., an APX 6000 vs. an XPR 7550e). This one tiny step can prevent the massive headache of ordering hundreds of antennas that don't fit.
Here are the connectors you're most likely to run into:
- SMA (SubMiniature version A): A small, threaded connector you'll find on most modern portable radios. It screws on for a secure, weather-resistant connection.
- BNC (Bayonet Neill–Concelman): A larger connector common on older portables and test equipment. It's a quick-disconnect style—you just push and twist to lock it.
- N-Type: A big, beefy, threaded connector. You'll see these on base station antennas and vehicle mounts where you need an absolutely rock-solid, weatherproof connection.
That's it. Just by matching the frequency to your environment and double-checking the connector on your radios, you can make sure every dollar you spend on your Motorola radio antennas actually improves your team's safety and effectiveness.
Choosing the Right Antenna Type for the Mission
Once you’ve got the right frequency for your environment, it’s time to pick the right physical antenna for the job. This isn't just a minor detail—the physical form factor of your Motorola radio antennas is just as critical as the frequency band you're operating on. We basically have three buckets to choose from: handheld, mobile (for vehicles), and base station antennas.
Getting this right from the start saves you money and headaches. It keeps you from dropping a ton of cash on a complex setup when a simple one will do, or worse, hamstringing your team's range by picking an antenna built for convenience over performance. Each type is a trade-off between signal strength, concealability, and cost.
Handheld Antennas for Portable Radios
When you're dealing with portable radios, the choice really boils down to two options: the short "stubby" antennas or the longer, classic "whip" antennas. This is your classic balancing act between staying low-profile and getting the best possible performance.
A stubby antenna is exactly what it sounds like: short, compact, and discreet. Its biggest advantage is that it doesn't scream "I have a radio," making it perfect for undercover work or private security needing to blend in. But that small size comes with a very real trade-off: less range.
Practical Example: An undercover detective at a crowded festival will probably opt for a stubby antenna on their APX radio. It won't give away their position, but they know they have to stay in closer proximity to their team because the signal simply won't travel as far. It's a calculated, mission-specific choice.
On the other hand, a longer whip antenna is all about raw performance. That extra length lets it grab and throw a signal much more effectively, which can be a lifesaver in areas with spotty coverage. For a patrol officer or a firefighter, where every foot of communication range counts, the whip is the standard for a reason.
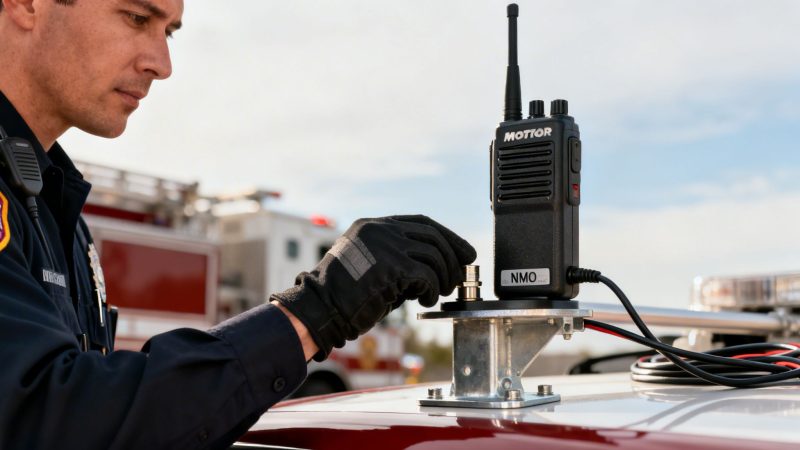
Mobile Antennas for Vehicles
For vehicles, the antenna itself is only half the battle; the mounting system is just as crucial. Your mount determines the antenna's performance, how permanent the install is, and what it's going to cost you in the long run. The three most common mounts you'll see are magnetic, NMO, and glass mounts.
Magnetic Mounts: These are the quick-and-dirty solution. A strong magnet clamps the antenna base to a metal surface, usually the roof. They're great for temporary setups or personal vehicles, but you often get lower performance, and the exposed cable tends to wear out, leading to replacement costs down the line.
NMO (New Motorola) Mounts: This is the professional standard you see on nearly every fleet vehicle. An NMO mount means drilling a small hole in the vehicle's body (usually the roof) for a permanent, weatherproof, and high-performance connection. You get the best possible signal and a rock-solid, durable install.
Glass Mounts: These antennas are a two-part system that sticks to the inside and outside of a vehicle's window, passing the signal through the glass. They give you a clean look with no holes, but they offer the worst performance of the three. It’s a compromise for when drilling just isn't an option.
This decision tree helps visualize how your environment dictates the ideal frequency band.
As you can see, UHF is the clear winner for dense urban environments, whereas VHF really shines in more open, rural terrain.
Money-Saving Insight: A fleet manager for an ambulance service chooses permanent NMO mounts for their new vehicles. Yes, the initial install is more involved, but the superior performance boosts reliability on the street. That durable connection also slashes future maintenance headaches and costs from failed cables and bad signals, making it a very smart long-term investment.
Base Station Antennas for Fixed Locations
For a fixed spot like a dispatch center, fire station, or command post, you need an antenna designed for wide-area coverage or a very specific, targeted link. This is where omni-directional and directional antennas come in.
An omni-directional antenna sends and receives signals in a full 360-degree pattern, kind of like a lighthouse beam sweeping the coastline. This is what you want for a city dispatch center that has to talk to units scattered all over its jurisdiction. It gives you broad, reliable coverage. You can see how this works in practice by exploring Resgrid's advanced personnel and unit mapping features.
A directional antenna (often a "Yagi") is the complete opposite. It focuses all of its energy into a single, tight beam, like a laser pointer. You use this to forge a powerful point-to-point link over a long distance, connecting two fixed locations with a signal that won't quit.
Practical Example: A central command post might use a directional antenna to shoot a solid data link to a remote incident command post miles away, guaranteeing a stable connection where a weaker omni-directional signal would never reach. This ensures critical data, like real-time video or mapping updates from services like Resgrid, gets through without interruption.
Installing Mobile and Base Station Antennas for Peak Performance
You can have the best Motorola radio antennas money can buy, but if they aren't installed correctly, you're just throwing money away. Proper installation is the secret weapon for unlocking your antenna's full potential. It's the difference between a crystal-clear signal and frustrating static when it matters most.
For both mobile and base station setups, the core principles are simple but absolutely critical. Getting them right not only boosts performance but also prevents expensive repairs and equipment failures down the line.

Optimizing Vehicle Antennas With a Proper Ground Plane
When mounting an antenna on a vehicle, the single most important concept to get right is the ground plane. Think of your vehicle’s metal roof as a trampoline for your radio signal. The antenna uses this large metal surface to effectively bounce its signal out into the world.
The bigger and more centered that trampoline is, the higher and farther the signal can go. This is why antenna placement is so crucial for any mobile unit. Sticking an antenna on a trunk lid or fender is like putting your trampoline in a corner—it just won’t work as well.
Money-Saving Insight: A center-roof NMO mount creates a nearly perfect 360-degree ground plane. This simple placement can improve signal strength by as much as 3 dB compared to a trunk-lid or fender mount. That boost in performance can extend your usable range by miles, often eliminating the need for a costly signal booster.
For any first responder vehicle, from patrol cars to ambulances, a permanent NMO mount drilled into the center of the roof is the gold standard for a reason. It ensures the maximum range and reliability that are non-negotiable for systems like AVL. You can learn more about how antenna performance impacts these systems in our guide to AVL units for first responders.
The First Responder Advantage
This relentless focus on reliable connections is what’s driving huge growth in the Land Mobile Radio (LMR) antenna market. It stood at USD 1,500 million in 2024 and is projected to hit USD 2,700 million by 2032.
Public safety agencies depend on these antennas for unbreakable communication links. UHF models are leading the way at 44.12% market share, largely because of their superior ability to punch through buildings and other obstacles in dense urban environments. You can see more data on the LMR antenna market on futuremarketreport.com.
Base Station Antennas: Height Is Might
When it comes to base station antennas at a dispatch center or firehouse, the guiding principle couldn't be simpler: height is might.
The higher you can get that antenna, the farther your signal will travel and the better it will overcome obstructions like buildings, hills, and trees. Simply getting your antenna up high and clear of its immediate surroundings can have a dramatic impact on your coverage area. It's one of the most cost-effective ways to improve your entire radio network without buying a single new piece of equipment.
- Avoid Obstructions: Mount your antenna well above any rooftop clutter like HVAC units, chimneys, or other antennas. These objects can block or reflect your signal, creating frustrating dead spots.
- Use High-Quality Cable: Invest in low-loss coaxial cable like LMR-400, especially for long runs from the radio to the roof. Cheap cable can bleed a significant amount of your signal before it even reaches the antenna.
- Weatherproof Everything: Use coax sealant and weather boots on every single outdoor connection. Water intrusion is one of the top causes of signal degradation and can lead to a very expensive cable replacement job.
Money-Saving Insight: A rural fire department was battling spotty radio coverage and was seriously considering a multi-thousand-dollar repeater. Before writing the check, they tried moving their base station antenna from a low side-mount to a tall mast on the building's roof peak. This simple, low-cost change instantly expanded their coverage, and they avoided the repeater purchase entirely. This saved their department budget, which could then be re-allocated to other critical services.
Troubleshooting Common Antenna Problems and Safety
Scratchy audio? Range suddenly drops off a cliff? It’s a frustrating moment, but don't jump to conclusions about a dead Motorola radio just yet. More often than not, the problem isn't the radio itself, but something much simpler and cheaper to fix: the antenna.
Before you spend time and money sending a unit out for service, a quick once-over of the antenna system can solve the vast majority of communication headaches. Most issues boil down to small, overlooked details like a loose connection, a frayed cable, or a bit of corrosion.
A Quick Troubleshooting Checklist
When your signal starts acting up, always start with the basics. This simple process helps you quickly pinpoint the most common culprits.
Check the Physical Connection: Is the antenna on your portable screwed on tight? A loose antenna is hands-down one of the top reasons for poor performance. For vehicles, give the connector a wiggle to make sure it's firmly seated.
Inspect the Antenna Itself: Give the antenna a good look. See any cracks, splits, or obvious bends in the whip? Any physical damage is going to kill your signal quality.
Examine the Coaxial Cable: On mobile and base station setups, the cable is a frequent point of failure. Trace its entire length, looking for any pinches, cuts, or worn spots, paying close attention to where it passes through a wall or vehicle body.
Look for Corrosion: Check the antenna's base and the radio's connector port. Any green or white crusty buildup is bad news. Corrosion acts like an insulator and will stop your signal in its tracks.
A quick diagnostic check can help you narrow down the issue before it escalates. We've put together a simple table to guide you through some frequent symptoms and their likely causes.
Common Antenna Problems and Simple Fixes
| Symptom | Likely Antenna-Related Cause | Quick Fix to Try | When to Call a Technician |
|---|---|---|---|
| Scratchy or weak audio | Loose connection or damaged antenna whip. | Tighten the antenna. Inspect for cracks or bends. | If the antenna is secure and undamaged, the radio itself might need service. |
| Sudden, severe range loss | Damaged coaxial cable (pinched or cut). | Visually inspect the cable. Test with a multimeter (see below). | If the cable looks good but fails a continuity test, it needs replacement. |
| Intermittent signal drops | Corrosion on the connectors. | Disconnect and clean connectors with a contact cleaner or pencil eraser. | If cleaning doesn't restore a stable connection, the connector may be damaged. |
| High SWR reading on a meter | Improperly grounded mount or a short in the cable. | Check the vehicle mount's ground connection. Test the cable for a short. | Persistent high SWR can damage the radio and requires professional diagnosis. |
Remember, this table covers the most common field issues. If you've run through these checks and are still stumped, it might be time to bring in an expert.
Money-Saving Tip: Test Your Cable With a Multimeter
Here’s a trick every fleet manager should know. A bad coax cable is a classic failure on vehicle installs, but you can diagnose it in five minutes with a basic multimeter. Just set it to continuity mode (the one that beeps).
- Step 1: Unplug the cable from both the radio and the antenna base.
- Step 2: Touch one probe to the center pin on one end of the cable and the other probe to the center pin on the opposite end. You should hear a beep—that means the connection is good.
- Step 3: Now, check for a short. On the same connector, touch one probe to the center pin and the other to the outer metal shell. It should not beep. If it does, you've found a short, and the cable is toast.
Actionable Insight: This simple check confirms whether the cable is good or bad. A new cable is a fraction of the cost of a new radio, saving your budget for where it's needed most. Instead of decommissioning a vehicle for an expensive radio repair, a tech can swap the cable for under $50, getting the unit back in service quickly and cheaply.
Preventative Maintenance and Safety
The best way to fix a problem is to prevent it from happening in the first place. A simple quarterly inspection of all your vehicle and base station antennas for wear and corrosion costs nothing but can save you from major failures down the road. If you need more specific guidance, you can always reach out to the Resgrid support team.
It’s also amazing how much technology has evolved to improve reliability. For example, Motorola's work on smart antennas is a huge deal in a global market that hit USD 6,918.8 million in 2022 and is on track for USD 14,485.9 million by 2030. These advanced systems, found in modern P25 radios, can actively reduce interference by up to 40% in noisy RF environments. You can read more about the smart antenna market and its growth on grandviewresearch.com.
Finally, never forget about safety. Radio frequency (RF) energy, especially from high-power base stations or vehicle radios, can be hazardous. Always make sure personnel keep a safe distance from transmitting antennas to comply with RF exposure limits. And whatever you do, never touch an antenna while someone is keying the mic—it can cause a nasty RF burn.
Answering Your Top Motorola Antenna Questions
Even after you’ve got a handle on the basics, there are always a handful of specific questions that pop up. We get these all the time from folks in the field and the people managing the agencies. Let's get you some straight answers so you can make smart calls that save money and keep your team talking.
Can I Use a Non-Motorola Antenna on My Motorola Radio?
The short answer is yes, you can. But it’s a huge gamble. As long as you match the frequency band, the connector type, and the impedance (which is always 50 ohms for this gear), a third-party antenna will technically work. This is one of those classic "penny wise, pound foolish" situations, though.
Motorola designs and tunes its antennas to work perfectly with its own radios. It’s a complete system. That’s how they guarantee you’re getting the best possible range and performance, not to mention the durability you need for mission-critical work.
Money-Saving Insight: A cheaper, off-brand antenna might save you a few bucks today, but it's a real risk. A bad electrical match, what we call high SWR, can lead to weak signals and cut your range down significantly. Worse, it can actually fry your radio's expensive transmitter over time. For the kind of reliability you absolutely need, sticking with the manufacturer's gear is the only real long-term-cost-effective choice. It prevents costly radio repairs and ensures services like Resgrid get the clean signal they need to function.
How Much Range Can I Really Expect From My Antenna?
There’s no magic number here. Your actual range comes down to your radio's power, the antenna you're using, and—most importantly—the terrain and junk between you and the other radio. That said, we can give you some realistic estimates based on what we see in the real world.
- Handheld Radio (Urban): In a city full of buildings, you’re looking at 1-3 miles.
- Handheld Radio (Open Area): Out in a rural spot with clear line of sight, you might get 5-10 miles.
- Vehicle Radio (Properly Installed): A mobile radio with a good antenna mounted center-roof can easily hit 10-30 miles, keeping you reliably connected to dispatch or your repeaters.
Actionable Insight: If you're in a fringe signal area, just swapping the little "stubby" antenna on your portable for a full-size "whip" can often double your usable range. This is a sub-$20 fix that can prevent a dropped call at a critical moment and is far cheaper than upgrading the radio itself.
What Is a Gain Antenna and Do I Need One?
Think of a gain antenna like the reflector on an old flashlight. It doesn't create any more light, but it focuses all the light it has into a tighter, brighter beam that goes farther. A gain antenna does the exact same thing with your radio signal, concentrating its power in a specific direction.
You only really need one if you’re trying to fix a very specific problem. It's a special tool, not something everyone needs to slap on their radio.
Practical Example: We worked with a law enforcement agency that had a patrol route down a long, straight highway. At the far end, repeater coverage was spotty. We had them install 3dB gain antennas on their vehicles. This focused the signal right down the highway, punching through that weak zone and keeping them in solid contact with dispatch. This targeted solution cost about $60 per vehicle, saving them from a far more expensive repeater installation.
How Often Should I Replace My Radio Antenna?
You should replace an antenna based on its condition, not a calendar. If the antenna on your portable is cracked, bent, or just looks beat up, replace it immediately. A damaged antenna will kill your performance and can even hurt the radio itself.
For vehicles, doing a quick inspection every quarter is a smart habit to get into. Look for obvious damage from things like low-hanging tree branches, and check for any corrosion building up at the base. A well-maintained, professionally installed NMO mount antenna can last for years, but you have to keep an eye on it to avoid a failure when you can least afford it.
At Resgrid, we believe in giving first responders the tools and the knowledge they need to build communication systems they can count on. Our dispatch, management, and logistics platform is built from the ground up to keep your team connected when it matters most. See how we can support your mission at https://resgrid.com.